
Split level homes have a unique charm, but they also pose a design challenge when it comes to outdoor spaces. That mid-level entry and staggered floor plan mean a standard single-height deck often looks awkward or requires excessive stairs. The good news? A well-designed deck can turn that quirky architecture into a stunning multi-level retreat that flows naturally with the home’s footprint. Whether someone’s looking to expand usable square footage, create distinct outdoor zones, or just avoid a towering staircase from the yard, the right deck design makes all the difference.
Table of Contents
ToggleKey Takeaways
- Back deck ideas for split level homes should use tiered platforms or wraparound layouts to match the home’s staggered architecture instead of a single tall structure.
- Proper footings, ledger board flashing, and building permits are essential for split level decks, as they carry significant structural weight and must meet local code requirements.
- Creating distinct functional zones—such as dining, lounging, and fire pit areas—maximizes usable outdoor space across multiple deck tiers.
- Composite decking offers low-maintenance durability for split level projects at $5–$10 per square foot, while pressure-treated lumber provides a budget-friendly framing option.
- Built-in seating, cable railings, and low-voltage LED lighting enhance both aesthetics and functionality while optimizing the unique multi-level design.
- Phasing the build over multiple seasons and hiring contractors only for critical structural work can significantly reduce costs without compromising safety or code compliance.
Why Split Level Homes Need Special Deck Considerations
Split level architecture typically features three or four floors, with living spaces staggered at different elevations. The back of the house might exit from the main level, which sits roughly 4–6 feet above grade, or from a lower level that’s partially below ground. This creates two main challenges: matching deck height to the door threshold and managing the transition to ground level.
A deck attached at the mid-level often requires a long run of stairs to reach the yard, eating up space and making the structure feel disconnected from the landscape. Alternatively, building at ground level means constant trips up and down interior stairs to access outdoor space, which defeats the purpose of easy indoor-outdoor flow.
Load-bearing and structural codes also come into play. A multi-level deck adds significant weight and lateral loads, especially if it wraps around corners or ties into multiple floors. Most jurisdictions require a building permit for decks over 30 inches above grade or those attached to the house, and split level decks almost always fall into that category. Footings need to extend below the frost line, and ledger boards must be properly flashed and bolted to the rim joist, not just the siding.
Finally, split level homes often have varying door heights on the back façade. A sliding door at the main level might sit several feet higher than a walkout basement door. Any deck plan needs to account for both access points, or the homeowner ends up with one stranded door that’s awkward to use.
Multi-Level Deck Designs That Match Your Home’s Architecture
The best deck designs echo the home’s split geometry instead of fighting it. Two approaches work particularly well: tiered platforms and wraparound layouts.
Tiered Decking Solutions
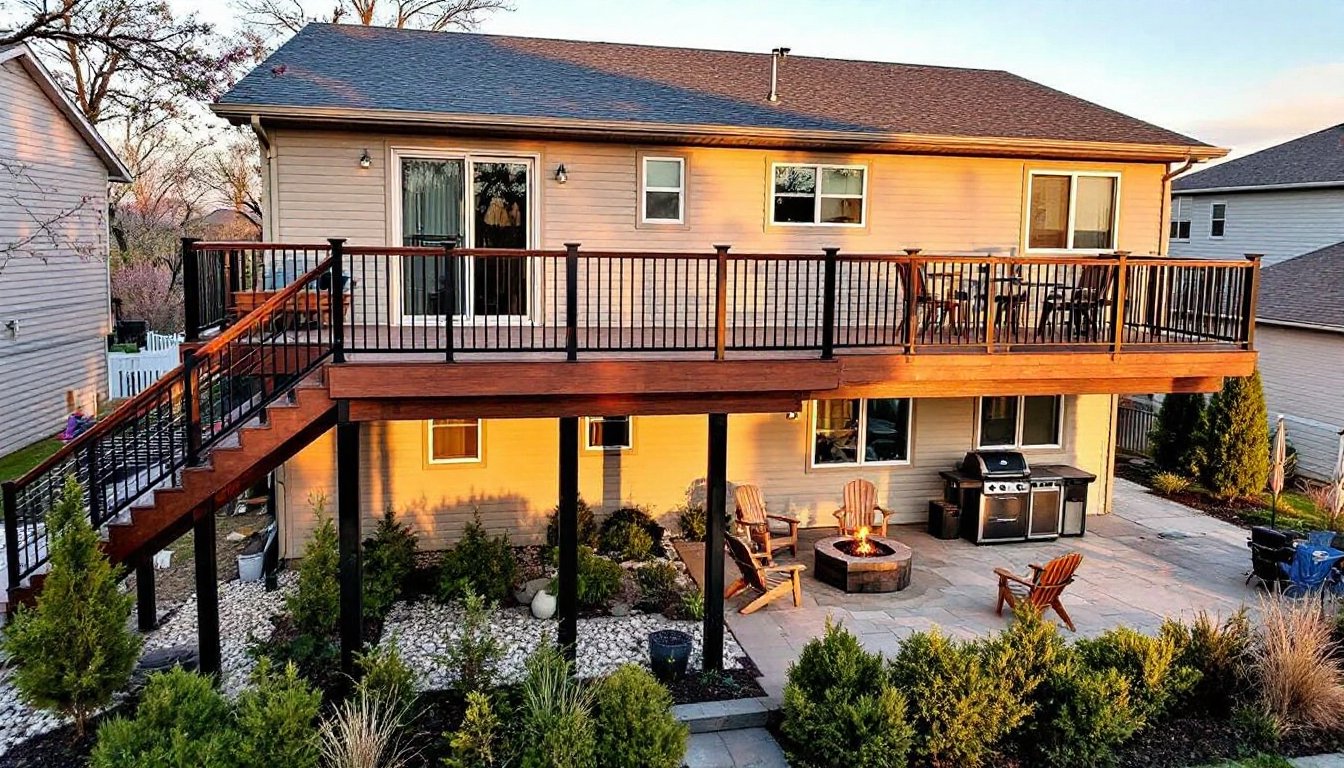
A tiered deck uses two or three distinct platforms at different heights, connected by short runs of stairs or even wide step-downs. The upper tier attaches to the main level door, typically 4–6 feet off the ground, while a lower tier sits closer to grade or connects to a walkout basement.
Each tier can serve a different function. The upper level often becomes a dining or grilling zone with quick access to the kitchen, while the lower platform works well for a fire pit, lounge seating, or a transition to a patio or garden path. This setup reduces the total number of stairs between the deck and yard compared to a single tall structure.
Building tiered decks requires careful planning of joist spans and beam placement. Each level needs its own framing support, and the stair stringers between tiers must meet code (typically a 7¾-inch max rise and 10-inch min tread). Use 2×10 or 2×12 joists for spans over 12 feet, and make sure posts are set on concrete footings sized for the soil type and frost depth in the region.
One major advantage of tiered designs: they look intentional. Instead of a towering fortress of stairs, the deck feels like a natural extension of the home’s multi-level footprint, blending with landscaping and reducing visual bulk.
Wraparound Deck Layouts
A wraparound deck follows the contour of the house, connecting multiple exit points and creating a continuous outdoor corridor. This works especially well when the split level has doors on adjacent walls, say, a slider on the main level and a basement walkout around the corner.
The deck steps down as it wraps, mirroring the grade change along the home’s foundation. This creates a series of shallow transitions rather than one dramatic staircase. Homeowners can add built-in benches or planters at the elevation changes, turning what could be a tripping hazard into a design feature.
Wraparound layouts do require more material and labor. There’s additional framing at corners, more posts and footings, and often a need for cantilevered joists to keep sightlines clean. But the payoff is major: the deck feels expansive, connects multiple rooms to the outdoors, and can incorporate shade structures or pergolas over high-traffic sections.
From a structural standpoint, wraparounds must tie into the house ledger at multiple points, each properly flashed and inspected. Pay close attention to outdoor living design principles to ensure the layout enhances rather than complicates traffic flow.
Maximizing Space and Function on Your Split Level Deck
Split level decks inherently create zones, so lean into that instead of treating the whole deck as one generic space. Define each platform or section with a clear purpose: cooking and dining, lounging, container gardening, or kids’ play.
Built-in seating works especially well on multi-level decks. A bench along the railing of the upper tier saves floor space and creates a visual boundary between levels. Use 2×4 or 2×6 framing topped with matching decking boards, and add a hinged lid to turn bench boxes into weatherproof storage for cushions or grilling tools.
Railings and gates aren’t just code requirements, they’re design opportunities. Cable railing keeps sightlines open and complements modern or minimalist homes, while traditional wood balusters suit craftsman or ranch styles. For split level decks with young kids or pets, add a gate at the top of any stair run longer than three steps.
Lighting transforms multi-level decks from daytime-only spaces into evening retreats. Low-voltage LED systems are DIY-friendly and energy-efficient. Install post cap lights on railing posts, recessed lights in stair risers, and strip lighting under bench edges or along the fascia. Use a transformer sized to handle the total wattage, and run 12- or 14-gauge landscape wire in conduit where it crosses under decking.
Don’t overlook the space beneath an elevated deck. If the upper tier is 6 feet or higher off the ground, the area below can become covered storage, a potting station, or even a screened-in lower patio. Frame it in with lattice or horizontal slat panels, and add a gravel or paver floor to keep things tidy.
Material Choices for Durability and Style
Material selection affects both the look and the maintenance load. Split level decks tend to be larger and more complex, so durability matters.
Pressure-treated lumber remains the most budget-friendly framing option. Use ground-contact rated (0.60 PCF retention) for any posts or joists within 6 inches of soil. For decking and railings, standard above-ground PT works, but it requires annual staining or sealing to prevent warping and splinters. Expect PT decking to cost $2–$4 per square foot for materials.
Composite decking offers low maintenance and consistent color. Brands like Trex, TimberTech, and Fiberon use a wood-fiber and polymer blend that resists rot, insects, and UV fade. Composites run $5–$10 per square foot, and they don’t require staining, just occasional washing with soap and water. They do expand and contract with temperature swings, so follow the manufacturer’s gapping specs (usually 1/8 to 1/4 inch).
Cedar and redwood deliver natural beauty and some rot resistance, but they’re pricier ($6–$12 per square foot) and still need regular sealing. They’re best reserved for railings or accent features where the warmth of real wood shines.
For a modern look, consider aluminum railings or powder-coated steel posts. Both are code-compliant, virtually maintenance-free, and pair well with composite decking. Many home improvement experts recommend mixing materials, PT framing with composite decking and metal railings, for a balance of cost and curb appeal.
Fastener choice matters, too. Use hot-dipped galvanized or stainless steel joist hangers, bolts, and screws to prevent rust stains. Hidden fastener systems (like Camo or Ipe Clip) create a clean surface with no visible screw heads, though they add labor time and cost.
Budget-Friendly Back Deck Ideas for DIY Homeowners
Building a multi-level deck isn’t cheap, but smart planning can trim costs without sacrificing quality or safety.
Phase the build. Start with the upper tier attached to the main level, then add lower platforms or wraparound sections in year two. This spreads out material and labor costs and lets the homeowner test the layout before committing to the full design.
Stick with standard dimensions. Decking boards come in 12-, 16-, and 20-foot lengths. Plan joist spacing and platform widths to minimize cuts and waste. A 12-foot-deep deck with joists 16 inches on center uses full-length boards and standard joist spans, keeping both material and labor down.
DIY the prep and demo. Hire a contractor for the structural framing, ledger attachment, and inspection, but handle site prep, old deck removal, and finish work (decking, railings, staining) independently. This hybrid approach keeps the critical structural work up to code while saving on labor.
Buy materials in bulk or off-season. Lumber yards and big-box stores often discount decking and framing lumber in late fall or early spring. Composite manufacturers sometimes run promotions or offer contractor pricing for large orders, even to DIYers.
Use basic PT for framing, upgrade where it shows. No one sees the joists and beams once the deck is done. Spend the budget on composite or hardwood decking, quality railings, and durable hardware. A well-built PT frame with premium surface materials looks high-end without the full price tag.
Incorporate garden design elements for added value. Built-in planters, pergola posts, or trellis sections add visual interest and functionality without major cost. A simple 2×6 frame filled with potting soil becomes a railing-mounted herb garden, and vertical slats on one side of the deck create privacy and a backdrop for climbing vines.
Finally, get multiple bids if hiring out any portion. A split level deck is more complex than a basic rectangle, so quotes can vary widely. Make sure each bid includes the same scope, footings, framing, decking, railings, stairs, and finish, to compare apples to apples. And always confirm the contractor pulls permits and schedules inspections. Skipping that step can cause serious headaches at resale or if an issue arises later.
With the right design and material choices, a split level deck transforms an awkward elevation into a true outdoor asset, one that adds usable space, boosts curb appeal, and makes the home more enjoyable year-round.


